Oracle Database : User access control – 2

Object Privilege: কোন অবজেক্ট এর উপর বিশেষ কর্ম সম্পাদনের জন্য যে অধিকার দেওয়া হয় তাকে Object Privilege বলে। নিচের টেবিলে বিভিন্ন Object Privilege এর
জন্য প্রদত্ত প্রিভিলেজ এর তালিকা দেওয়া হল……

Object Privilege 
Object Privilege
Table
View
Sequence
Procedure
ALTER
*
*
DELETE
*
*
EXECUTE
*
INDEX
*
INSERT
*
*
REFERENCES
*
SELECT
*
*
*
UPDATE
*
*
[একটি অবজেক্ট এর যে সকল প্রিভিলেজ কাজ করে সে গুলো এস্টারিস্ট  মার্ক দিয়ে দেখান হয়েছে]

          Syntax: GRANT object_priv [(columns)]
    ON object
    TO {user|role|PUBLIC}
    [WITH GRANT OPTION];

উদাহরণঃ GRANT লিখে প্রিভিলেজ এর নাম, On লিখে অবজেক্ট এর নাম এবং To এর পর যে ইউজার কে দিব তার নাম দিতে হবে। কোন নির্দিষ্ট কলামের উপরে দিতে চাইলে প্রিভিলেজ এর পর কলামের নাম উল্লেখ করে দিতে হবে। যেমন……

GRANT  update (department_name, location_id)
ON     departments
TO     scott, manager;
Passing Privilege: একটি Object এর উপর কোন ইউজারকে দেওয়া প্রিভিলেজ অন্য কোন ইউজারকে দেওয়ার প্রয়োজন হতে পারে। অর্থাৎ আমাকে দেওয়া প্রিভিলেজ যখন অন্য কাওকে আমি দিব এইটাই হল Passing Privilege এটা আমি কোন নির্দিষ্ট ইউজারকে দিতে পারি আবার সবাইকে (Public) দিতে পারি। প্রিভিলেজ Passing এর সময় WITH   GRANT OPTION এবং PUBLIC এই দুটি কিওয়ার্ড ব্যাবহার করা হয়
WITH   GRANT OPTION: কোন অবজেক্ট এর উপর ইউজারকে প্রিভিলেজ দেবার সময় অনুরুপ প্রিভিলেজ অন্য ইউজারকে দেবার জন্য WITH GRANT OPTION ব্যবহার করা হয়
যেমনঃ GRANT  select, insert
ON departments
TO scott
WITH   GRANT OPTION;
এখানে scott কে departments টেবিলের উপরselect এবং insert প্রিভিলেজ দেওয়া হয়েছে WITH GRANT OPTION দেবার ফলেscott অনুরুপ প্রিভিলেজ অন্যান্য ইউজার কে দিতে পারবে
PUBLIC: একই সাথে সকল ইউজারকে প্রিভিলেজ দেবার জন্য PUBLIC কিওয়ার্ড ব্যবহার করা হয়
যেমনঃ GRANT  select
ON alice.departments
TO PUBLIC;
এখানে alice ইউজারের departments টেবিলে সবাইকেselect করার প্রিভিলেজ দেওয়া হয়েছে
Dictionary View থেকে প্রিভিলেজ দেখাঃ Session Privs থেকে কোন ইউজারকে দেওয়া সমস্ত প্রিভিলেজ দেখা যায়। যেমন HR এ কানেক্ট থাকা অবস্থায় এর প্রিভিলেজ দেখার জন্য……
          select * from session_privs;  
Role View: কোন ইউজারকে দেওয়া রোল দেখার জন্য……
          select * from user_role_privs;
Privilege View: রোল এবং System Privilege দেখার জন্য………
          select * from role_sys_privs;
রোল এবং Object Privilege দেখার জন্য………
          select * from role_tab_privs;
Revoke: কোন ইউজারের কাছ থেকে প্রিভিলেজ প্রত্যাহার করে নেওয়া হল Revoke
          Syntax: REVOKE {privilege [, privilege…]|ALL}
ON object
FROM {user[, user…]|role|PUBLIC}
[CASCADE CONSTRAINTS];
          Example: Revoke System Privilege-
REVOKE  CREATE USER, CREATE SESSION
FROM scott;
          Example: Revoke Object Privilege-
REVOKE  select, insert
ON departments
FROM scott;
……………………End……………………

Oracle Database: User access control – 1

আজ কে যা শিখবঃ
  • User Privilege এবং System Privilege
  • কোন টেবিলকে Privilege প্রদান 
  • Data Dictionary থেকে Privilege দেখা
  • Role তৈরি এবং প্রদান
  • Role এবং Privilege এর পার্থক্য

Privilege: কোন বিশেষ এসকিউএল স্টেটমেন্ট চালানোর অধিকারকে Privilege বলা হয়। Privilege দুই ধরণের- ১. System Privilege এবং ২. Object Privilege 
System Privilege: ডাটাবেজের সাথে সম্পর্কিত Privilege গুলো হল System Privilege। ওরাকল ডাটাবেজে একশর বেশী Privilege রয়েছে। মূলত ডাটাবেজ Administrator প্রিভিলেজ গুলো দিয়ে থাকে। নিম্নে System Privilege এর একটি তালিকা দেওয়া হলো… 
System Privilege
Privilege
Description
DBA
Grantee can Database Administrator
CREATE USER
Grantee can create other Oracle users.
DROP USER
Grantee can drop another user.
ALTER ANY INDEX
Enables a user to alter any index in the database.
Note: There is no ALTER INDEX statement.
ALTER ANY MATERIALIZED VIEW
Enables a user to alter any materialized view in the database.
Note: There is no ALTER MATERIALIZED VIEW statement.
ALTER ANY PROCEDURE
Enables a user to alter any PL/SQL procedure, function or package in the database.
ALTER ANY SEQUENCE
Enables a user to alter any sequence in the database.
Note: There is no ALTER SEQUENCE statement.
ALTER ANY TABLE
Enables a user to alter any table in the database.
ALTER ANY VIEW
Enables a user to alter any view in the database.
Note: There is no ALTER VIEW statement.
CACHE_MANAGER
Enables a user to perform operations related to cache groups.
CREATE ANY CACHE GROUP
Enables a user to create a cache group owned by any user in the database.
CREATE ANY INDEX
Enables a user to create an index on any table or materialized view in the database.
CREATE ANY MATERIALIZED VIEW
Enables a user to create a materialized view owned by any user in the database.
CREATE ANY PROCEDURE
Enables a user to create a PL/SQL procedure, function or package owned by any user in the database.
CREATE ANY SEQUENCE
Enables a user to create a sequence owned by any user in the database.
CREATE ANY SYNONYM
Enables a user to create a private synonym owned by any user in the database.
CREATE ANY TABLE
Enables a user to create a table owned by any user in the database.
CREATE ANY VIEW
Enables a user to create a view owned by any user in the database.
CREATE CACHE GROUP
Enables a user to create a cache group owned by that user.
CREATE MATERIALIZED VIEW
Enables a user to create a materialized view owned by that user.
CREATE PROCEDURE
Enables a user to create a PL/SQL procedure, function or package owned by that user.
CREATE PUBLIC SYNONYM
Enables a user to create a public synonym.
CREATE SEQUENCE
Enables a user to create a sequence owned by that user.
CREATE SESSION
Enables a user to create a connection to the database.
CREATE SYNONYM
Enables a user to create a private synonym.
CREATE TABLE
Enables a user to create a table owned by that user.
CREATE VIEW
Enables a user to create a view owned by that user.
DELETE ANY TABLE
Enables a user to delete from any table in the database.
DROP ANY CACHE GROUP
Enables a user to drop any cache group in the database.
DROP ANY INDEX
Enables a user to drop any index in the database.
DROP ANY MATERIALIZED VIEW
Enables a user to drop any materialized view in the database.
DROP ANY PROCEDURE
Enables a user to drop any PL/SQL procedure, function or package in the database.
DROP ANY SEQUENCE
Enables a user to drop any sequence in the database.
DROP ANY SYNONYM
Enables a user to drop a synonym owned by any user in the database.
DROP ANY TABLE
Enables a user to drop any table in the database.
DROP ANY VIEW
Enables a user to drop any view in the database.
DROP PUBLIC SYNONYM
Enables a user to drop a public synonym.
EXECUTE ANY PROCEDURE
Enables a user to execute any PL/SQL procedure, function or package in the database.
FLUSH ANY CACHE GROUP
Enables a user to flush any cache group in the database.
INSERT ANY TABLE
Enables a user to insert into any table in the database. It also enables the user to insert into any table using the synonym, public or private, to that table.
LOAD ANY CACHE GROUP
Enables a user to load any cache group in the database.
REFRESH ANY CACHE GROUP
Enables a user to flush any cache group in the database.
SELECT ANY SEQUENCE
Enables a user to select from any sequence or synonym on a sequence in the database.
SELECT ANY TABLE
Enables a user to select from any table, view, materialized view, or synonym in the database.
UNLOAD ANY CACHE GROUP
Enables a user to unload any cache group in the database.
UPDATE ANY TABLE
Enables a user to update any table, or synonym in the database.
XLA
Enables a user to connect to a database as an XLA reader.

User তৈরি করাঃ ডিবিএ এবং যে সকল User কে Create User প্রিভিলেজ দেওয়া আছে শুধুমাত্র তারাই ইউজার তৈরি করতে পারবে।
Syntax: Create User user
Identified by password;
Example: Create User emp
Identified by 123;
ইউজার এর পাসওয়ার্ড পরিবর্তন করাঃAlter User লিখে User এর নাম এবং শেষে নতুন পাসওয়ার্ড দিতে হবে।
     Example: ALTER USER HR                       
IDENTIFIED BY employ;
প্রিভিলেজ প্রদানঃ কোন ইউজারকে ডাটাবেজে কানেক্ট করার জন্য Create Session প্রিভিলেজ দেওয়া হয়। তাই প্রথমে ইউজারকে আমরা Create Session প্রিভিলেজ দিব। এবং এর মাধ্যমে কোন ইউজারকে প্রিভিলেজ কিভাবে দেওয়া হয় তা শিখব।
Syntax: GRANT privilege [, privilege…]            
TO user [, user| role, PUBLIC…];
       Example: GRANT create session
TO scott;

Role: Role হল অনেক গুলো প্রিভিলেজ এর একটি গ্রুপ। যদি কোন ডাটাবেজ এ অনেক ইউজার থাকে তাহলে প্রত্যেককে আলাদা ভাবে একই প্রিভিলেজ প্রদান করা বেশ সময় সাপেক্ষ ব্যাপার। তাই রিলেটেড প্রিভিলেজ গুলকে নিয়ে একটি রোল তৈরি করে তা ইউজারকে প্রদান করা হয়।
Role তৈরিঃ CREATE ROLE  লিখে তারপর রোলের নাম দিতে হবে……
          Example: CREATE ROLE manager;
Role কে প্রিভিলেজ দেওয়াঃ GRANT লিখে প্রিভিলেজ গুলোর নাম দিতে হবে এবং শেষে যে রোলকে দিব তার নাম দিতে হবে……
          Example: GRANT create table, create view               
       TO manager;
কোন ইউজারকে রোল প্রদানঃ GRANT লিখে রোলের নাম তারপর যে সকল ইউজারকে দিব তার নাম……
          Example: GRANT manager TO DE HAAN, KOCHHAR;    
   
চলবে………

ডাটাবেজ ডিজাইন এন্ড ডেভেলপমেন্ট – 2

………গত পর্বের পর

Using Arithmetic Operator:
                কলামের সাথে বিভিন্ন গাণিতিক চলক যুক্ত করে হিসাব-নিকাশের কাজ করা হয়। গাণিতিক চলক গুলো নাম্বার ও ডেট নিয়ে কাজ করতে পারে। ওরাকলে ব্যবহিত গাণিতিক চলক সমূহ হল…
Operator
Description
+
Add
Subtract
*
Multiply
/
Divide

  Example:  

   SELECT last_name, salary, 12*salary+100

      FROM   employees;

Concatenation Operator:

                দুইটি Column, Arithmetic Expressions অথবা Constant Value কে সংযুক্ত করতে Concatenation Operator (।।) ব্যবহার করা হয়।  যে দুইটি কলামকে সংযুক্ত করব তার মাঝে এই Operator কে বসাতে হবে।  
            Syntax: SELECT column1 ।। column2 alias from table_name;
Using literal character & Alternative Quote (q) Operator:literal character এবং Alternative Quote এর কাজ প্রায় একই। দুটোই কুয়েরির মাঝে অতিরিক্ত লেখা বা মন্তব্য যোগ করতে ব্যবহার করা হয়। literal character ব্যবহার করে সহজেই দুটি কলামের মাঝে মন্তব্য যোগ করা যায়। এ জন্য দুটি কলামের মাঝে Concatenation Operator (।।) দিয়ে তার মধ্যে আবার String দিয়ে মন্তব্য যোগ করা হয়। String এর মধ্যে প্রায় সব কিছু লিখা গেলেও Quote (‘) mark ব্যবহার করা যায় না। এ ক্ষেত্রে Alternative Quote Operator ব্যবহার করা হয়।
           
Literal character Syntax:
                                                column1 ||’comment‘|| column2
     Alternative Quote Syntax:
                                                Column1|| q'[comment]’ ||column2
(এখানে যে ব্র্যাকেট দিয়ে শুরু করব সেই ব্র্যাকেট দিয়েই শেষ করতে হবে এবং যে কোন ব্র্যাকেট ব্যবহার করা যাবে) 
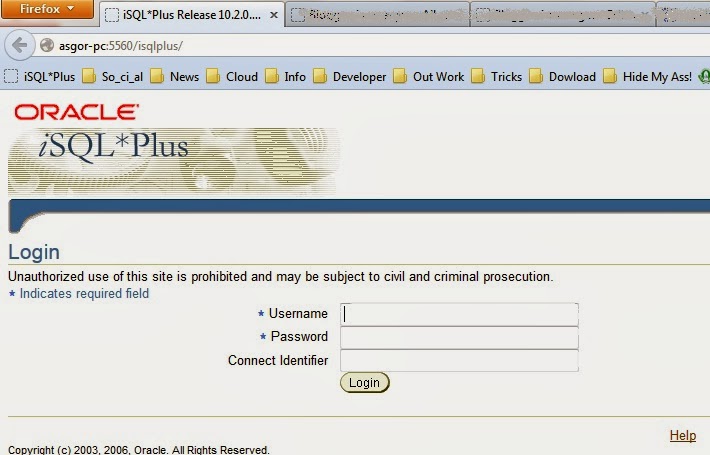
iSQL *Plus Environment
SQL Statement versus iSQL *Plus Commands:
                SQL Statement:  
·         SQL  একটি ল্যাঙ্গুয়েজ
·         SQL  এটি ANSI স্ট্যান্ডার্ড
·         SQL  Keyword সংক্ষিপ্ত করা যায় না
·         ডাটাবেজে SQL Statement ডাটা এবং টেবিল নিয়ে কাজ করে
iSQL *Plus Commands:
·         iSQL *Plus  হল কাজের পরিবেশ
·         iSQL *Plus  এর স্বত্বাধিকারী ওরাকল
·         iSQL *Plus  Command সংক্ষিপ্ত করা যায়
·         Browser-Run করে

  চ্যাপটার ১ সমাপ্ত

ডাটাবেজ ডিজাইন এন্ড ডেভেলপমেন্ট – 1

ডাটাবেজ প্রগ্রামের ধারাবাহিক টিউটোরিয়াল
ভূমিকাঃডাটাবেজ অনেকটা লাইব্রেরীর মত। একটা লাইব্রেরীতে বইগুলো যেমন করে সাজানো থাকে, ঠিক তেমনি করে ডাটাবেজেও তথ্য সাজানো থাকে। যাতে করে ব্যবহারকারী তথ্য সহজেই খুজে পায়। ডাটাবেজ তৈরির জন্য এসকিউএল (SQL) একটি শক্তিশালী প্রোগ্রামিং ল্যাংগুয়েজ। এসকিউএল দিয়ে
ডাটাবেজ তৈরির জন্য কিছু বিভিন্ন সফটওয়্যার ব্যবহার করা হয়। আমি এখানে ওরাকলের ডাটাবেজ সফটওয়্যার ব্যবহার করব। প্র্যাকটিস করার ওরাকল ডাটাবেজের এক্সপ্রেস এডিশন এখান থেকে ডাউনলোড করে নিতে পারেন।

আমার লিসনগুলো ওরাকল সার্টিফাইড প্রোগ্রামার (OCP) পরীক্ষার যে সিলেবাস আছে সে অনুযায়ী সাজানো হয়েছেপ্রথমেই Oracle Database Fundamental I দিয়ে শুরু করছি। লিসন শুরু করার আগে মূল বইটি এখান থেকে ডাউনলোড করে নিন।

Chapter 1 :  Retrieving Data Using the SQL SELECT Statement

এই অধ্যায়ে আমরা যে বিষয় গুলো দেখব
            ১. SQL Select Statement দিয়ে যেসব কাজ করা যায় তার তালিকা
            ২. Select Statement সম্পাদনা
            ৩. SQL Statement এবং iSQL *Plus  Commands এর মধ্যে পার্থক্য

SQL Select Statement দিয়ে যেসব কাজ করা যায়: কোন Database থেকে তথ্য খুঁজে বের করে আনার জন্য Select Statement ব্যবহার করা হয়। Select Statement দিয়ে মূলত তিনটি কাজ করা হয়……
         ১. Projection: কোন টেবিল থেকে এক বা একাধিক কলাম খুঁজে আনতে ব্যবহার করা হয়
         . Selection: কোন একটা টেবিলের রো খুঁজে আনার জন্য ব্যবহার করা হয়
         . Joining: দুইটা টেবিলের ডাটাকে সংযুক্ত করার জন্য ব্যবহার করা হয়।

Basic SELECT Statement:   

  SELECT *|{[DISTINCT] column|expression [alias],…}
  FROM    table;
এখানে,
            Select         = এক বা একাধিক কলামের তালিকা
   *                 = সমস্ত কলাম
            Distin          = ডুপ্লিকেট ভ্যালু বাদ দেবার জন্য ব্যবহার করা হয়
            Column       = কলামের নাম
            Alias            = কলামের হেডিং
            From Table  = টেবিলের নাম
                        ;       = Closing Tag

Example: Select department_id “Departments”
       from departments;

SQL স্টেটমেন্ট এর বৈশিষ্টঃ
            ১.  SQL স্টেটমেন্ট Case sensitive নয়।
            ২. SQL স্টেটমেন্ট এক বা একাধিক লাইনে লিখা যায়
            . SQL স্টেটমেন্টকে সংক্ষিপ্ত বা ভাঙ্গা যায় না
            . Clause গুলো সাধারনত আলাদা লাইনে লিখা হয়।
            ৫. SQL *Plus এ প্রতিটি SQL স্টেটমেন্টর শেষে অবশ্যই সেমিকলন (;) দিতে হবে

Continue………….

Solutions 3: Oracle Database Fundamental I


Oracle Database Fundamental I
 Practice 3 Solutions
                   1.      Write a query to display the current date. Label the column Date.
Solution: select sysdate from dual;

                  2.      The HR department needs a report to display the employee number, last name, salary, and salary increased by 15.5% (expressed as a whole number) for each employee. Label the column New Salary. Place your SQL statement in a text file named lab_03_02.sql.
                  3.      Run your query in the file lab_03_02.sql.
Solution: select employee_id, last_name, salary, salary+(salary*15.5/100) “New Salary”
from employees;
                  4.      Modify your query lab_03_02.sql to add a column that subtracts the old salary from the new salary. Label the column Increase. Save the contents of the file as lab_03_04.sql. Run the revised query.
Solution: select employee_id, last_name, salary, salary+(salary*15.5/100) “New Salary”, (salary+(salary*15.5/100))-salary “Increses”
from employees;
                 5.      Write a query that displays the last name (with the first letter uppercase and all other letters lowercase) and the length of the last name for all employees whose name starts with the letters J, A, or M. Give each column an appropriate label. Sort the results by the employees’ last names.
Solution: select initcap(last_name) “Name”, length(last_name) “Length of Name”
from employees
where last_name like ‘J%’ or last_name like ‘A%’ or last_name like ‘M%’
order by last_name;
Rewrite the query so that the user is prompted to enter a letter that starts the last name. For example, if the user enters H when prompted for a letter, then the output should show all employees whose last name starts with the letter H.
Solution: select initcap(last_name) “Name”, length(last_name) “Length of Name”
from employees
where last_name like ‘&name%’
order by last_name;
                 6.      The HR department wants to find the length of employment for each employee. For each employee, display the last name and calculate the number of months between today and the date on which the employee was hired. Label the column MONTHS_WORKED. Order your results by the number of months employed. Round the number of months up to the closest whole number.
Solution: select last_name, round(months_between(sysdate,hire_date),0) Months_worked from employees
order by 2;
                 7.      Create a report that produces the following for each employee: <employee last name> earns <salary> monthly but wants <3 times salary>. Label the column Dream Salaries.
Solution: select last_name||’ earns $’||salary||’ monthly but wants $’||salary*3 “Dream Salary”
from employees
                8.      Create a query to display the last name and salary for all employees. Format the salary to be 15 characters long, left-padded with the $ symbol. Label the column SALARY.
Solution: select last_name, lpad(salary,15,’$’) Salary
 from employees;
               9.      Display each employee’s last name, hire date, and salary review date, which is the first Monday after six months of service. Label the column REVIEW. Format the dates to appear in the format similar to “Monday, the Thirty-First of July, 2000.”
Solution: select last_name, hire_date, to_char((next_day(hire_date,’Monday’)),’fmday,” the “ddspth “of” month,yyyy’)
     from employees;
            10.  Display the last name, hire date, and day of the week on which the employee started. Label the column DAY. Order the results by the day of the week, starting with Monday.
Solution: select Last_name, hire_date, to_char(hire_date,’Day’) “Day”
from employees
order by to_char(hire_date-1,’d’)
Continue………